How to Really Build an End-Grain Axe Throwing Target
Here is an easy way to build a robust, safe and economical end-grain target for home use or even for a commercial venue

When I first started building axe throwing targets, the only guides I could find were how to build a small board you could hang on your wall at home for a bit of fun. These were also mostly aimed at knife throwers as the fashion was to build targets out of planks for hatchet throwing. This has changed over the last decade or so, and end-grain targets are far more widespread amongst hatchet throwers now. Over the years, I have also learned more about what it takes to create a great end-grain target. So, here is my take on building a robust, adaptable target suitable for home use, or even for a commercial venue.
Why an End-Grain Target?
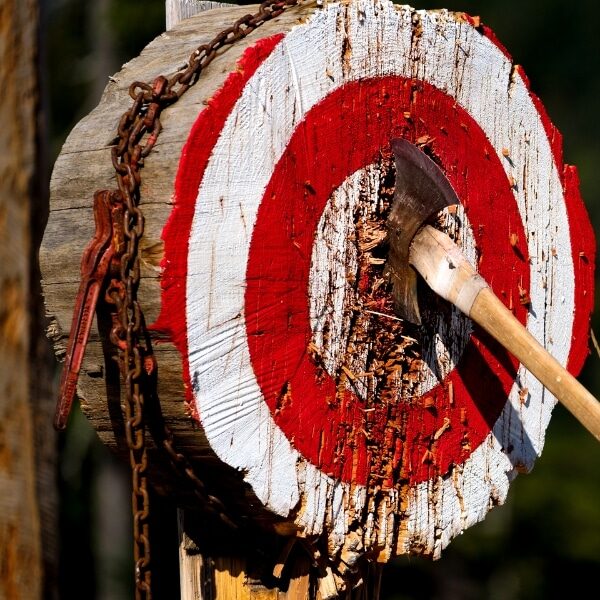
I won’t go into the debate of whether end-grain is better than plank targets (for more on that see The Great Target Debate. Will Planks or End-Grain Win Out?), but just to say if you take an axe and chop into the end of a log of softwood, ie into the end-grain of the wood, it will embed relatively easily. This is what we are recreating with an end-grain target.
Axe (and knife) throwers have understood that end-grain is good for targets for decades, which is why many, eg double bit axe or tomahawk throwers, have traditionally used tree “rounds”, or slices, of trees as targets. This is still a good way to create a target, even indoors, if you can source the rounds.
A further development of this are end-grain targets created by assembling a number of blocks of softwood, end-grain on, into a frame. This provides the benefits of an end-grain round, ie easy to stick and long lasting, with the versatility of being able to source blocks of softwood easily on an ongoing basis, ie to replace blocks as they wear.
Keeping Your End-Grain Blocks In Line
The end-grain target design below is designed to keep the blocks from moving about when hit. This is a common challenge for targets made up of multiple end-grain blocks, particularly once they start to get chipped from axe hits. My approach here is to screw the individual blocks in place from the rear of the target. This design also assumes that the target will be built in situ – end-grain targets are extremely heavy, so building it in the throwing lane is preferable, unless you are going to invest in winching equipment. This is a low effort/low cost approach which is very effective, but there are alternatives, which I’ll briefly mention here.
You could build a rigid fixed frame and pack the blocks tightly into it, possibly even glueing the blocks together. I don’t advise this approach. You can waste a lot of time and effort getting the blocks just right, so that they fit perfectly, but they will still move as soon as they are hit. Also, blocks contract/expand when dry/wet, so a rigid frame will never be the right size. Also, if you glue the blocks in place then it will be harder to replace individual blocks when they are worn.
Alternatively, you can create, or buy, a clamping system that will keep the end-grain blocks in place. This is usually a metal frame that goes around your blocks and can be tightened to keep them in place. This enables you to stack the blocks quickly into the frame and tighten them continually as they wear. When the blocks need to be replaced, you can release the clamps to remove them. This is a good approach, often used by commercial venues. It is equally as effective as my approach, it just costs a bit more to create, or buy, such a frame.
The End-Grain Target Design
Step 1: The Frame
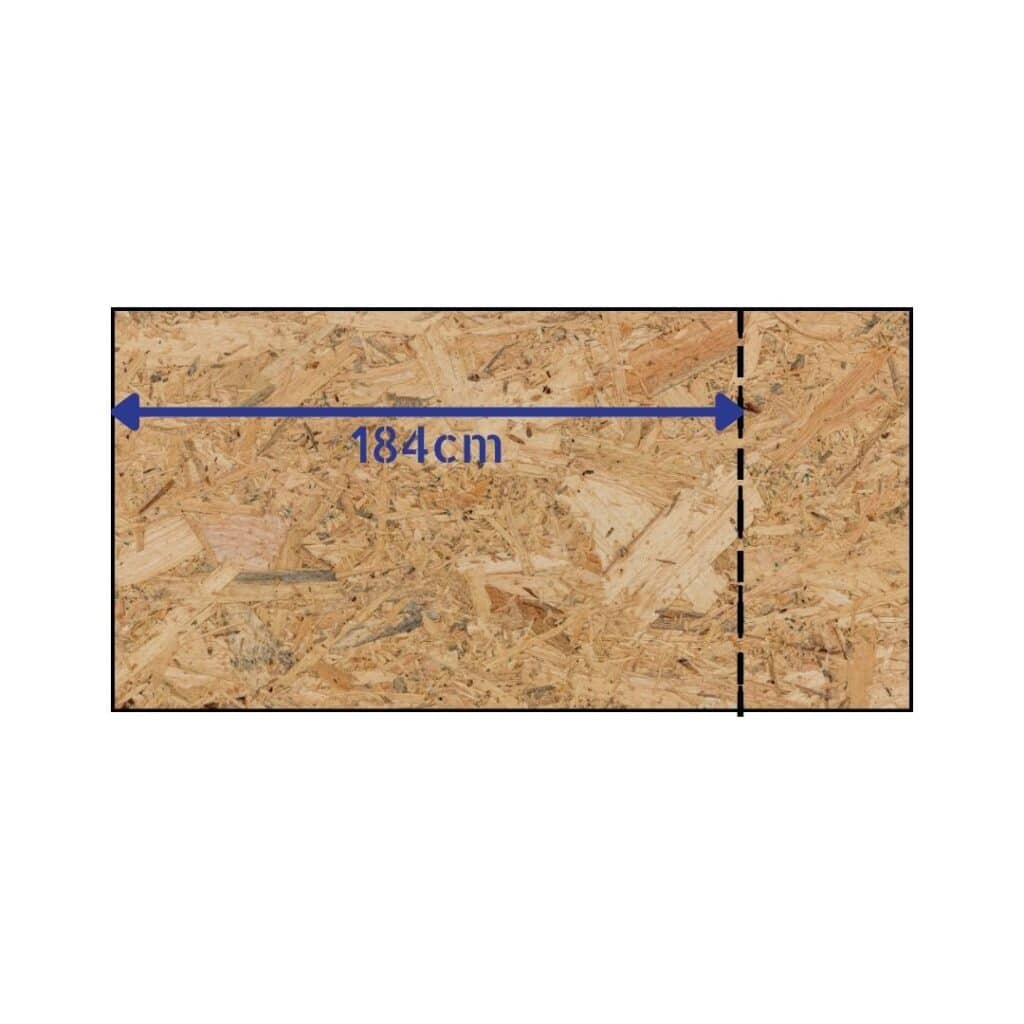
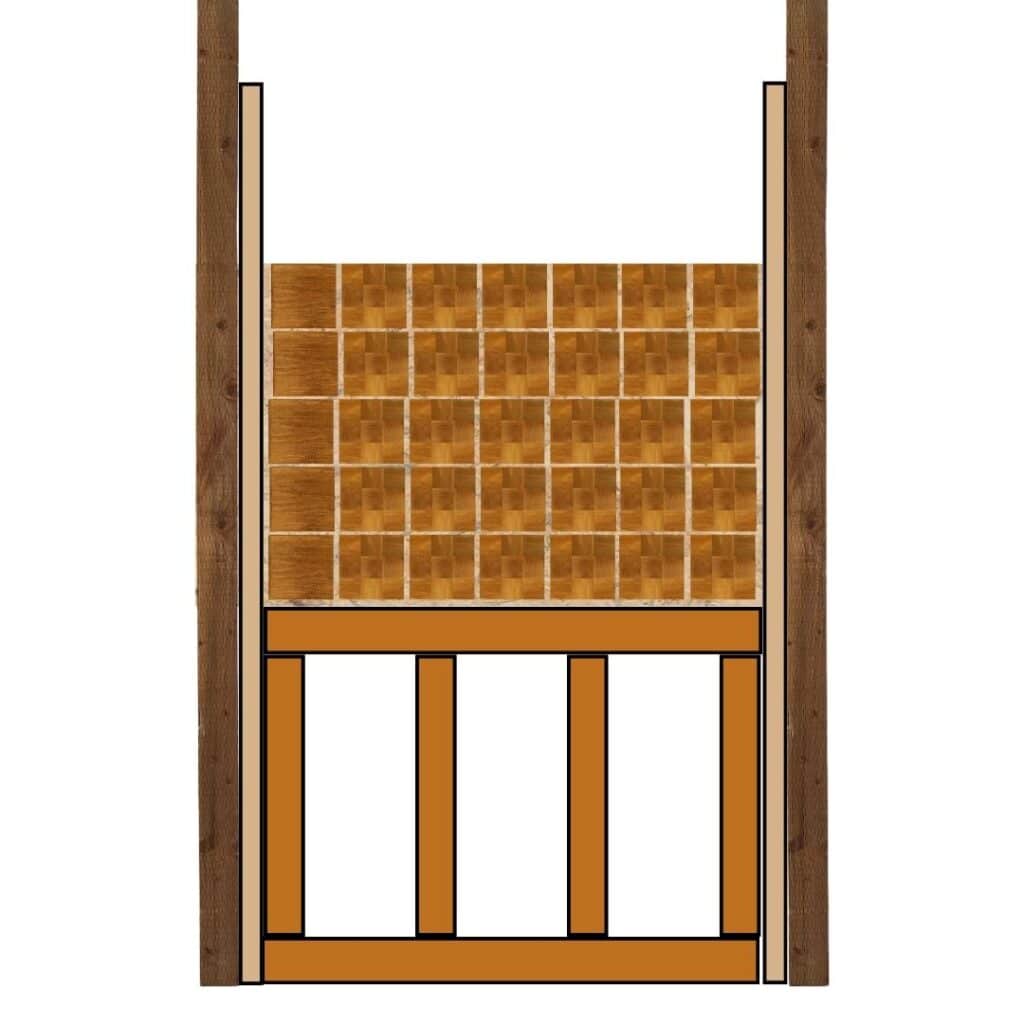
My “frame” is built around a sheet of OSB, because eventually the blocks will be screwed into this sheet to keep them in place. Because the blocks will be attached to the sheet, there is no need for a rigid wooden or adjustable metal frame around them. An 18mm depth is a firm enough thickness to keep it rigid.
- Cut a 2.4 x 1.2m OSB sheet along the width at 184cm
- (In this design, I am assuming that the sheet will be attached to wooden posts at each end, both with a width of 10cm. The posts will support the structure of the throwing lane, so if your lane posts are a different size, then the length of the sheet will need to be adjusted appropriately – ie the 184cm includes these 2x10cm post widths)
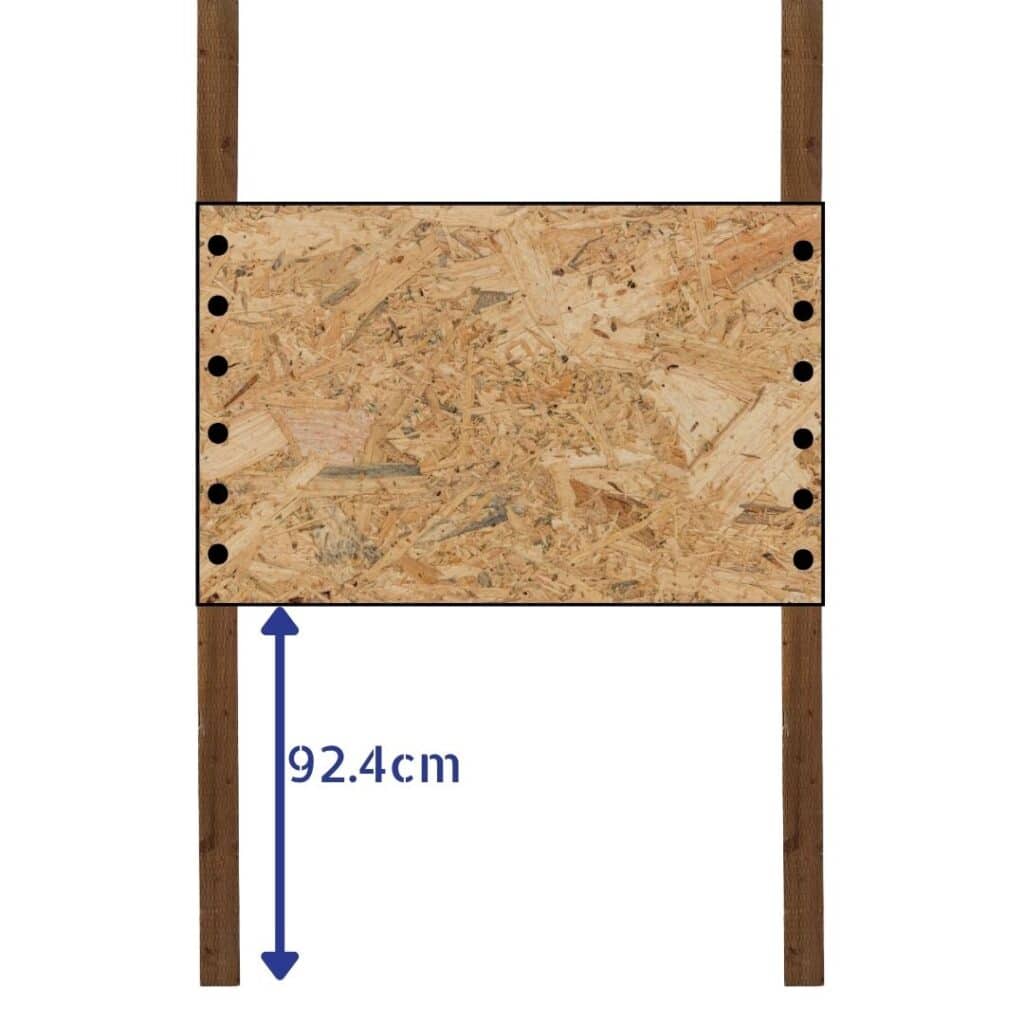
- Screw the board onto the posts at each end with the lower edge at 92.4cm from the floor
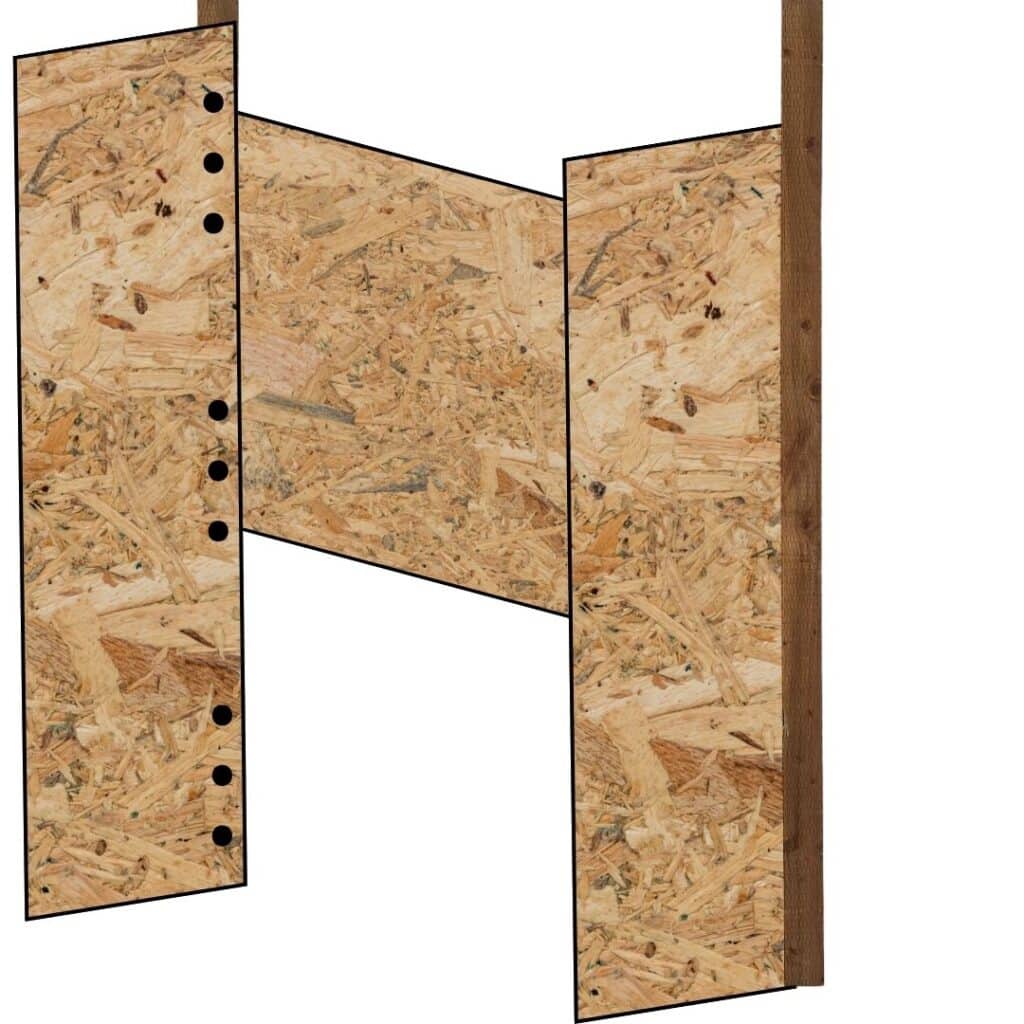
- Next take two more 2.4 x 1.2m 18mm OSB sheets and screw them at right angles to the existing upright posts (attached to the first OSB sheet) – to create a three-sided box structure
- Ensure that this structure is in the position that it will stay in permanently
- IMPORTANT: ensure that there is a gap behind of at least 50cm so that you can get behind it later, to screw the blocks in
- (This structure is free-standing, but is fairly flimsy, so I’m assuming it will be firmed up when the rest of the lane is built, eg the upright posts will be fixed to horizontal posts for the lane caging etc. This can be different from one venue to another, so I’m not specifying that here.)
Step 2: The Support for the Blocks
The end-grain blocks will rest upon a “shelf” made of CLS C16 timber W145mm D38mm. End-grain blocks are heavy, so putting them on a shelf in situ means you don’t have to hoist them up later.
- Cut 2 lengths to 160.4cm
- Cut 4 lengths to 84.8cm
- Assemble so that the 4 uprights are sandwiched between the 2 longer horizontal lengths, spaced evenly
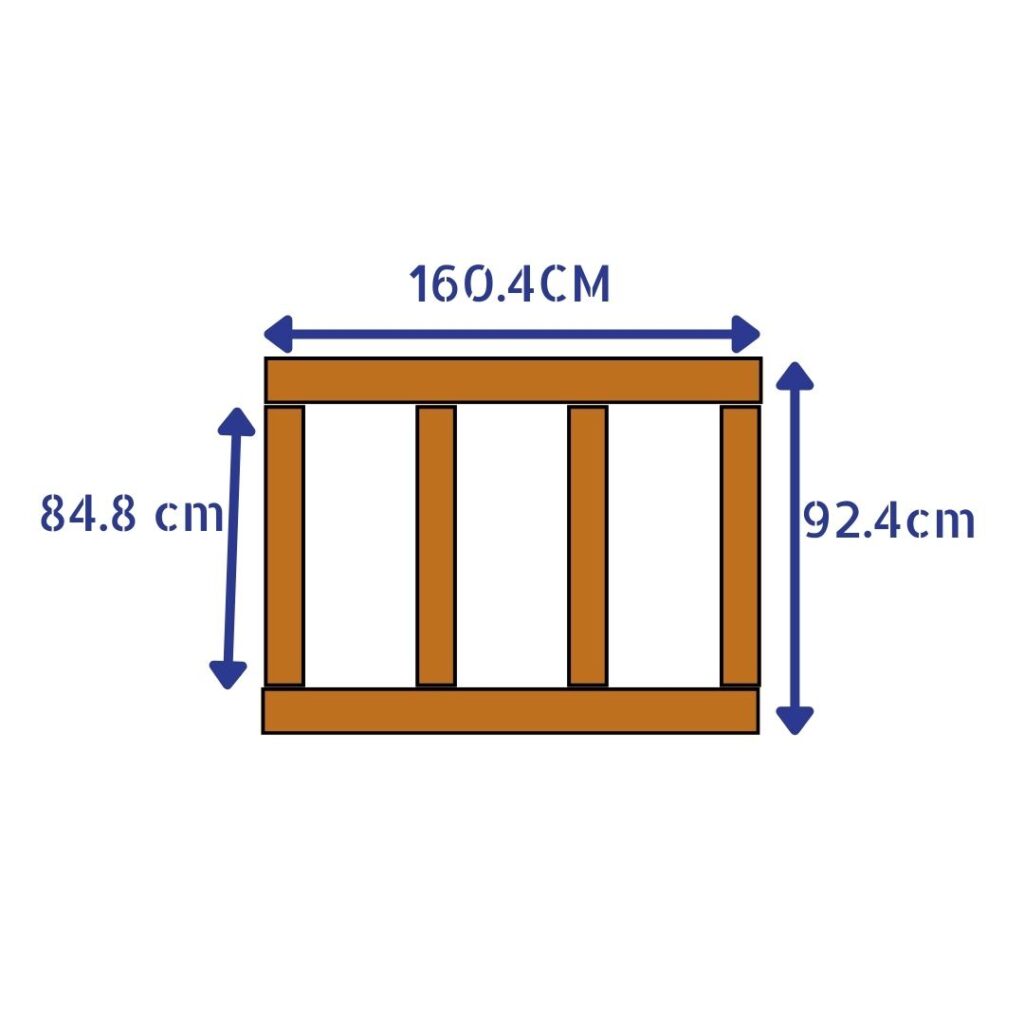
- Place the CLS shelf within the existing OSB structure and screw into place on each side
- IMPORTANT: ensure that the shelf is horizontal using a spirit level
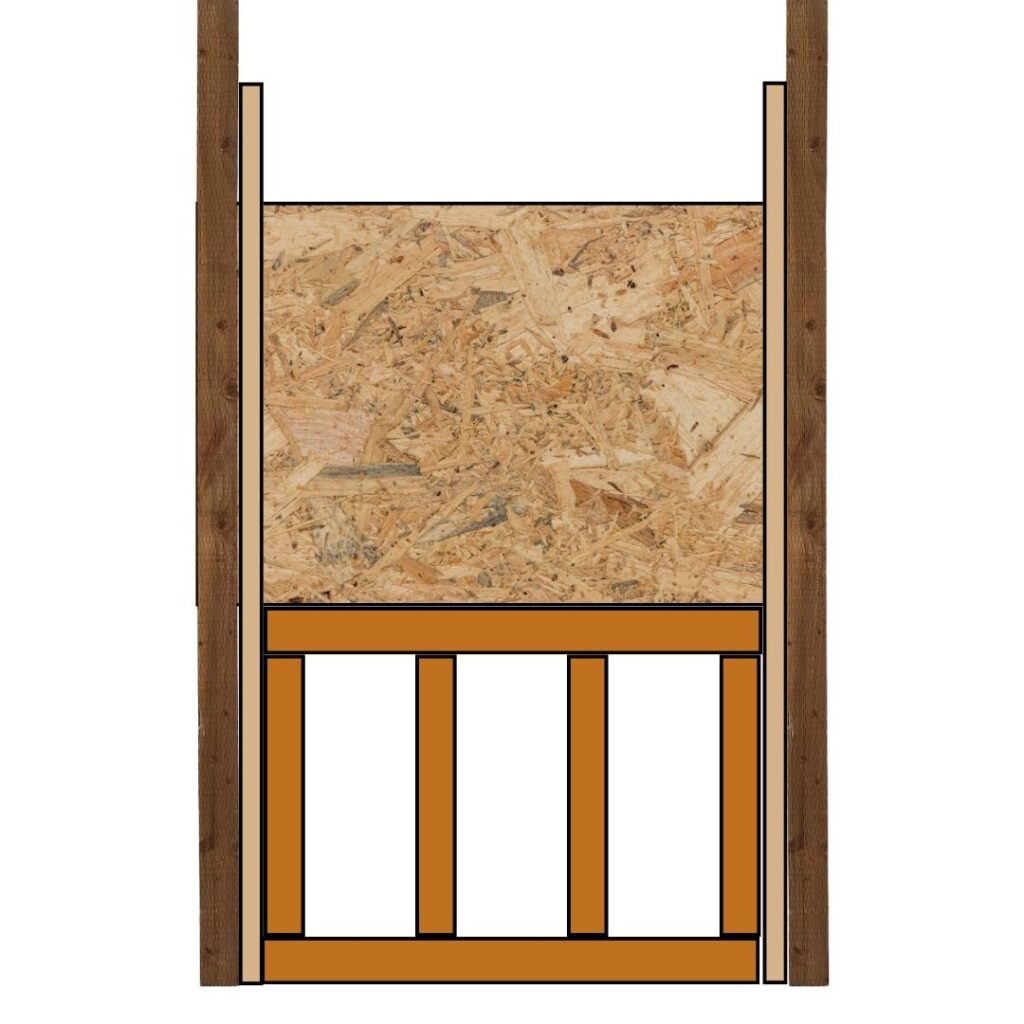
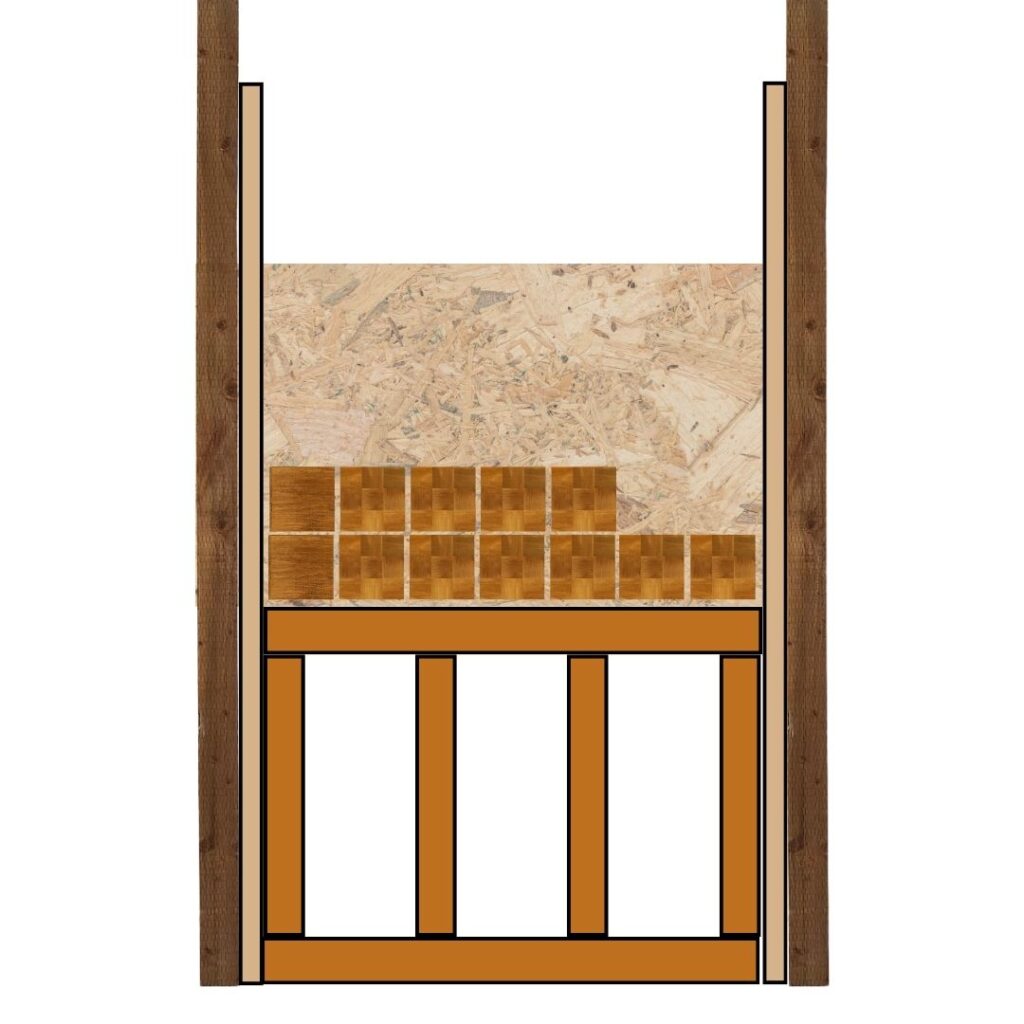
Step 3: Stack the End-Grain Blocks
The end-grain blocks are 20x20cm and 12.7cm deep. Any softwood is fine. I usually use Douglas Fir. I also prefer non-treated wood as it is easier to dispose of when needed, ie it can be used as firewood.
- Stack the blocks, end-grain facing forward, along the shelf row by row
- Screw each block from the rear, one block at a time, starting from the centre outwards, using a 7x75mm hex head exterior timber screw – 1 for each block
- IMPORTANT: ensure that there are no vertical gaps between the blocks. If necessary, adjust the rear screws to tighten the gap.
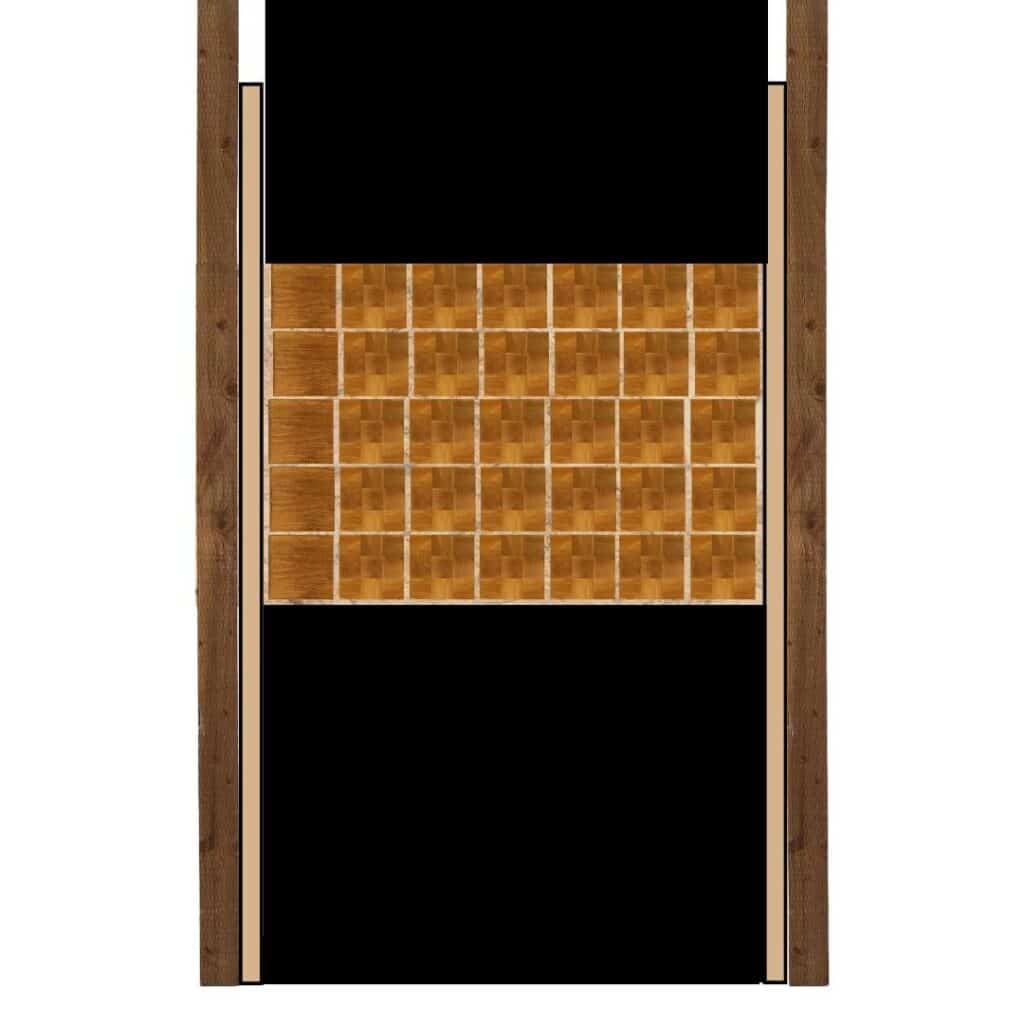
Step 4: Add Rubber Protection
The target is ready to go without this last step, but without any protection there is a danger that axes will miss the blocks and hit whatever is behind the target. Axes may break, bounce back or generally be a hazard. In addition, the tops of the blocks and the CLS timber may chip rapidly if hit by stray axes.
Rubber mats used in horse stables of about 20mm thickness are ideal
- Cut 2 rubber horse mats to a width of 160.4cm
- Mat 1 will be suspended from above the target area – it’s length will be relative to where it is suspended from (depending on your lane setup)
- The best option is to screw the mat to a piece of timber and suspend that from your ceiling or lane supports (or you can just hang it directly from wire or hooks)
- Suspend it about 10cm in front of the target so that the bottom edge is just below the top of the blocks – only fix at the top of the mat, so that it hangs freely (then when an axe hits it, it will move and take the impact, rather than bounce back)
- Mat 2 will be 92.4cm long
- Screw to the top of the “shelf” to protect the base.
- Cut a further rubber strip and glue it over the screw ends to prevent them being hit by an axe
Step 5: Create Your Target
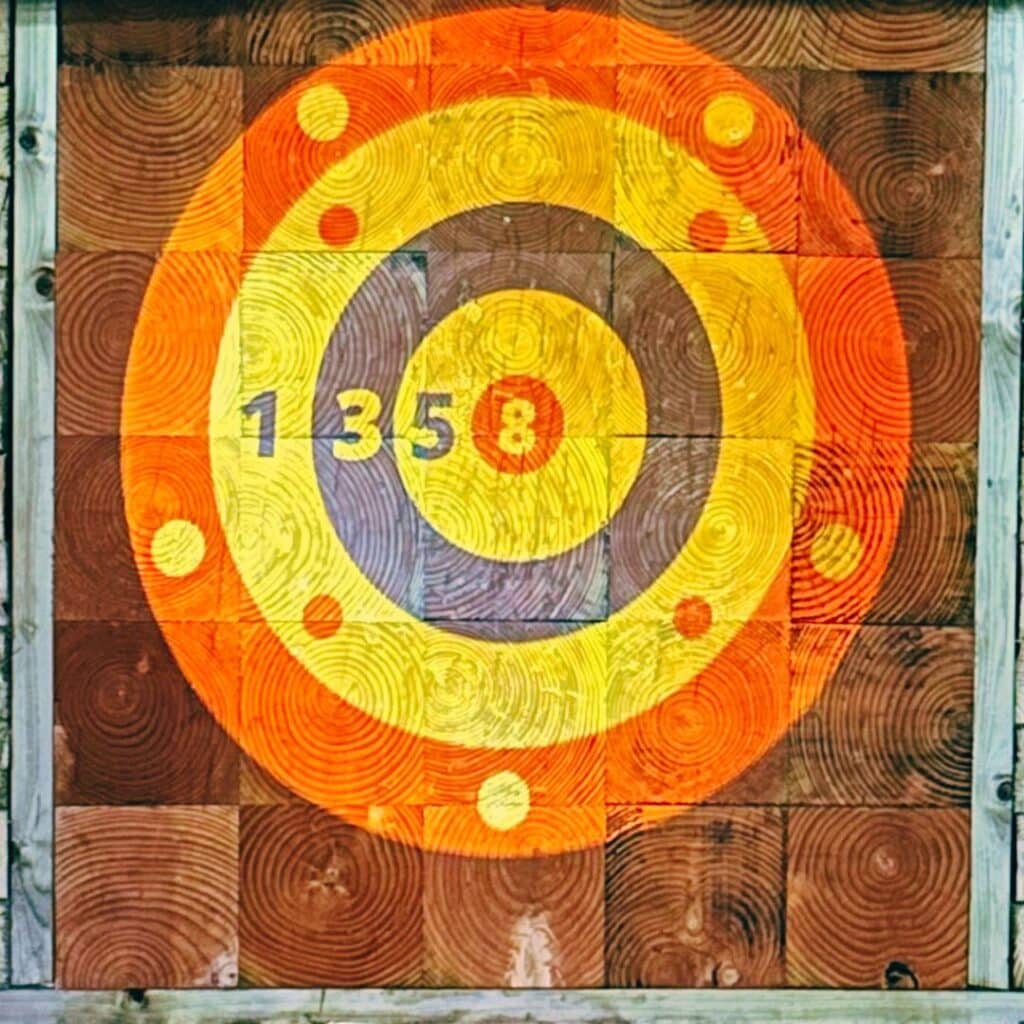
Now, all you need on your target is something to aim at. The idea of doing a 5×7 design is that there is a 5×5 (100cm2) area to throw at, with side borders to allow for misses (side borders could be reduced in width if you like).
Obviously it is up to you what target to put on the board, but if you want to enable competition on specific boards, eg IATF, WATL, UKAT et al, then you can get their target specifications from their rules.
Usually, if you are painting a target, then you can use a template to put over the target and paint it, like a stencil. These can be made, or in some cases bought from an axe throwing supplier. Painting on end-grain targets is not easy as it is an uneven surface.
Alternatively, you can project different targets on to the wood from a projector. This allows you to provide a wide variety of games and avoids having to paint on the surface of the wood.
After Care
Once the target is complete, soak the blocks with water and leave for a few hours before throwing. Soak repeatedly, especially when in use (I generally do every hour in use and at least once a day when not).