Everything You Need to Know About Tomahawk Throwing
New to tomahawk throwing? Here’s a handy guide to what it is all about, how to throw a hawk, dealing with slip fit hawks, how to choose a hawk – and more!

Tomahawk throwing (or ‘hawk’ throwing as they are often called) is a popular genre of axe throwing. Tomahawks are better known in outdoor, club-based throwing, but it’s not impossible to find them indoors too. If you’ve never thrown one before, here’s all the information you need to get started.
What is a Tomahawk?
The word “tomahawk” was an Algonquian name given to a small hand axe. Originally referring to a wood and stone axe used by the Algonquian peoples of North America, it began to be ascribed to iron and steel hand axes introduced by European settlers/invaders, around the 17th Century.
In the same way we might describe anything from a small kindling hatchet to a large double-bit felling axe as an “axe” the term “tomahawk” was applied to a variety of axes used as tools, clubs and battle-axes.
As the tomahawk developed, there were many variations in design, with some having polls or spikes at the rear of the head, and even a pipe tomahawk for ceremonial purposes.
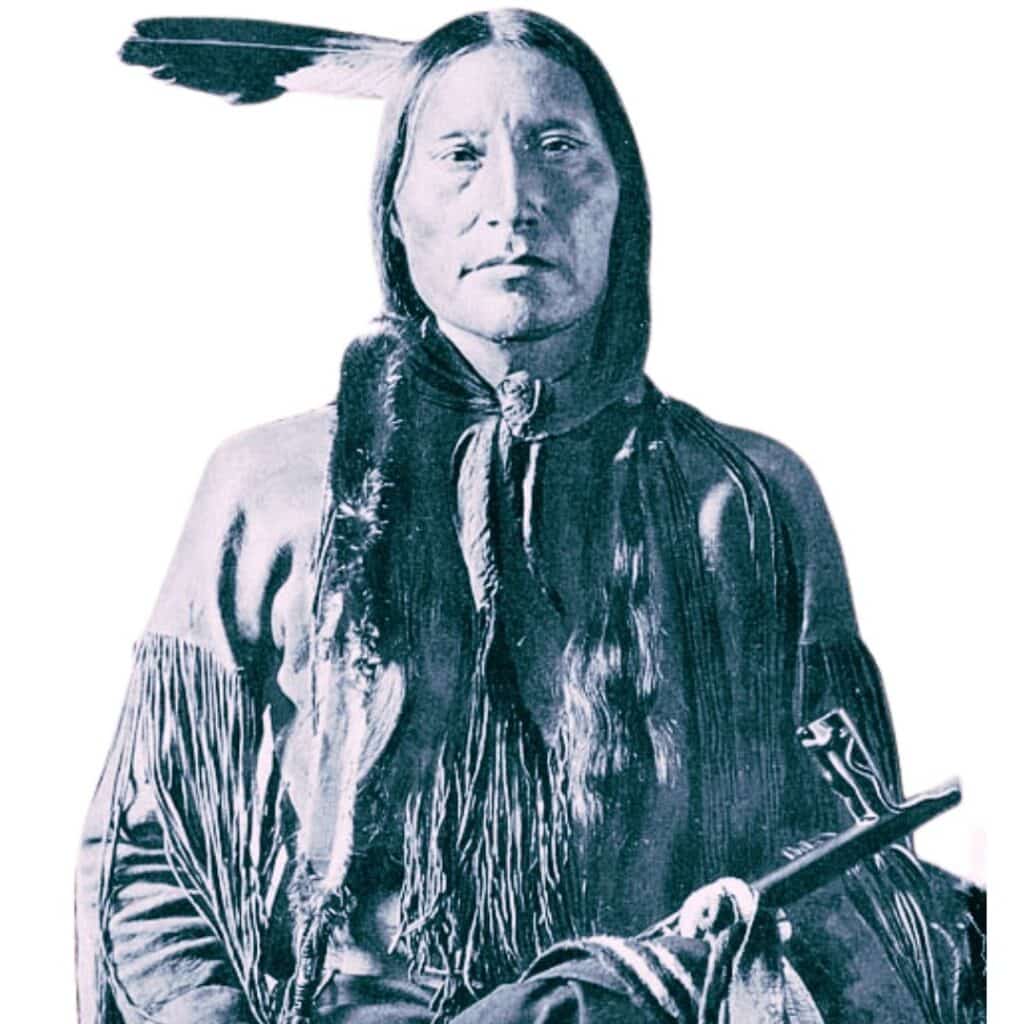
The multi-purpose lightweight tomahawk became a bushcraft staple, as well as its regular use in warfare. In particular, a modern tomahawk version was created for the USA army in the Vietnam War.
Throughout the 20th Century, it was also popularised as a throwing weapon, by enthusiasts intent on spreading the traditions of the ‘Wild West’.
With its motley development over the centuries, today you will find a variety of tomahawk styles on the market. However, amongst those who throw for sport, a tomahawk is generally recognised as a simple lightweight hand axe, with a straight (usually wood) handle and a slip fit head.
The Tomahawk as a Throwing Tool
It would be impossible to say when the native American peoples began to throw tomahawks, but certainly by the mid-18th Century it was an established and highly effective practice, as witnessed by Timothy Dwight in 1767:
Since the arrival of the English, they have used fire-arms. To these they add a long knife and a small battle-ax, to which they have transferred the name of Tomahawk. This instrument they are said to throw with such skill, as almost invariably to hit their mark at a considerable distance.1
Although originally thrown for hunting and battle, in the 20th Century it was also picked up by knife throwing entertainment acts and North American historical re-enactment societies. This sparked interest in tomahawk throwing as a sport. By the turn of the century, throwing organisations like EuroThrowers and IKTHOF had helped to develop hawk (alongside knife throwing) as a regulated sport worldwide. Today, there are a variety of local throwing clubs and outdoor ranges worldwide, that cater for hawks. There are also a number of club level, national and even international throwing competitions2.
The indoor/urban axe throwing phenomenon of the last decade or so has been focused on using fixed head hatchets, but not exclusively. It is becoming more popular for indoor venues to offer alternatives to throwing hatchets, including the use of hawks3.
Throwing A Tomahawk
Throwing a hawk is much the same basic technique as throwing any axe, although the weight of the hawk will affect the implementation.
Basic Hawk (Axe) Throwing Technique
- Hold the hawk (one or two-handed) in front of you
- Bending your arms, draw it backwards
- Make a chopping motion (as though you were going to embed the hawk in a wall immediately in front of you)
- Release the hawk at the end of the “chop”
- The hawk will then be set rotating and hit the target. Assuming you are the correct distance away it will hit the target blade on and stick
As with any axe, it is then just a matter of practise and experience to adjust your release, stance, grip etc to the particular nuances of the hawk in hand.
Hawks are typically lighter than other hand axes though, which affects the throw. (Historically, they were designed to be lightweight). Taking the Cold Steel Norse Hawk (a popular throwing hawk) specifications as an example, the overall weight is 25oz (0.7kg). Staying with Cold Steel, their Competition Throwing Hatchet (designed for most indoor hatchet throwing competition rules) is 30oz (0.85kg). There is not a huge amount of difference, but any difference will affect the throw. Obviously, hawks and hatchets can come in various sizes, but it is a helpful comparison.
What is more significant though is the proportion of the weight of blade to overall weight. The Competition Throwing Hatchet head is 21oz, so about 70% of the overall weight. This is a deliberate design choice. Throwing hatchets, with a large heavy axe head help the axe to rotate more easily with less effort. This is good for precise target throwing. More expensive throwing hatchets can have a axe heads of 75%+ of overall weight.4 In comparison, the Norse Hawk axe head is only 14oz, so only about 50% of overall weight.
A lighter hawk will generally need to be thrown firmly to ensure a stick. A proportionally lighter head means that the rotation needs slightly more work and the release point is later than a heavier axe. Simply throwing firmer can help. Better technique is achieved by increasing the speed of rotation of the hawk, ie by ‘whipping’ the hawk rapidly in the chopping action.
This whipping action creates greater rotational speed. This increases the forward momentum, overcoming the downwards gravitational pull and thus creating a firmer hit. (This can achieved over the head/shoulder or even by simply flicking the lightweight hawk in one hand).
The lighter hawk may also require subtle changes in stance and grip. This is very subjective though. Some throwing axeperts will insist that you always need to stand/grip in a very specific way for every axe, but that isn’t true. Personally, I find that I need better balance with the lighter hawks, so if I am throwing one-handed I will put my less dominant leg forward, ie to counteract the hawk in my dominant hand (whereas for a hatchet I prefer either legs parallel or dominant leg forward). I also tend to have a much firmer grip on hawks, to avoid twisting on release.
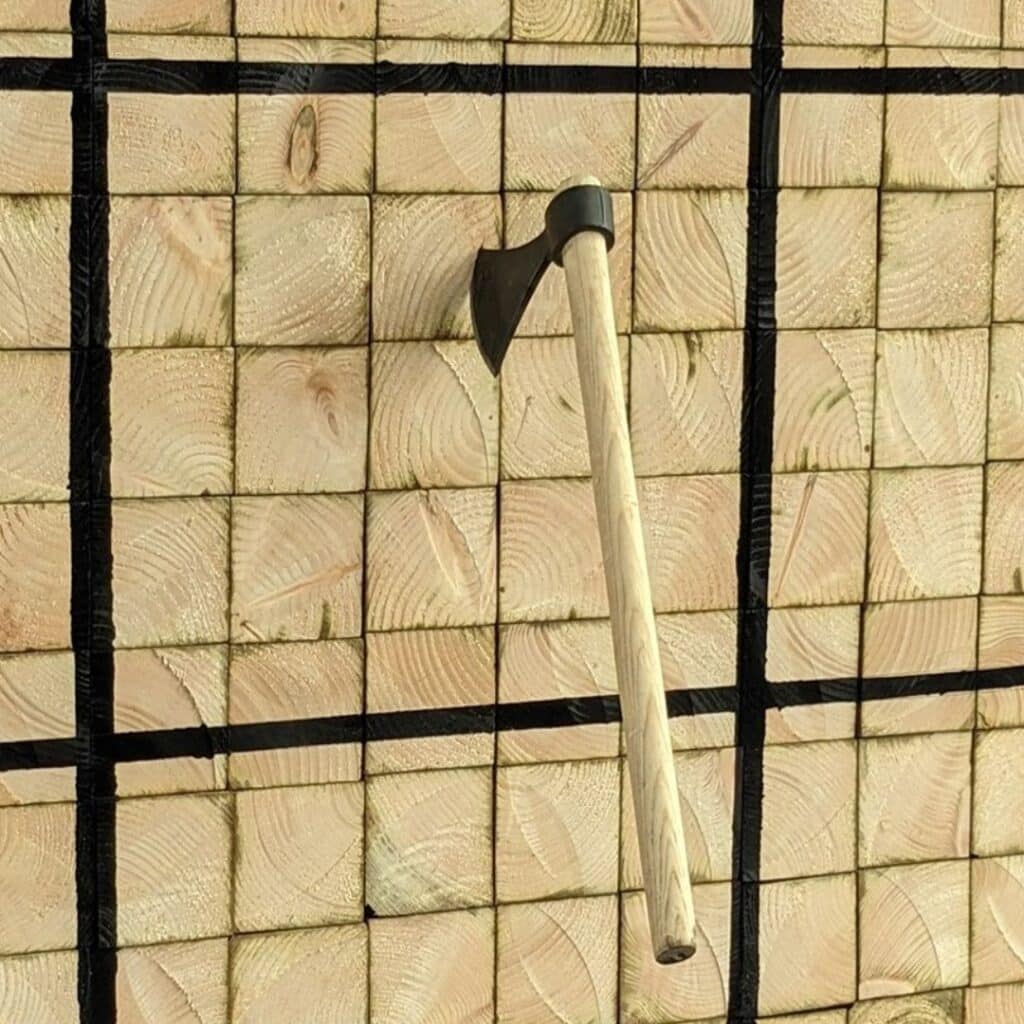
One other aspect of a lighter blade to be aware of is the point where the blade hits. A heavier, broader axe blade will cope with hitting the wood target near vertical, particularly if it is well profiled. (This is a useful way to make use of the whole 4 inches of blade to get a high score in hatchet competitions!) However, hawk blades are expected to hit on the corner and use the downward force of gravity plus momentum to embed in the wood, ie the angle of the handle will end up about 45º away from the board as it hits.
Managing a Slip Fit Hawk
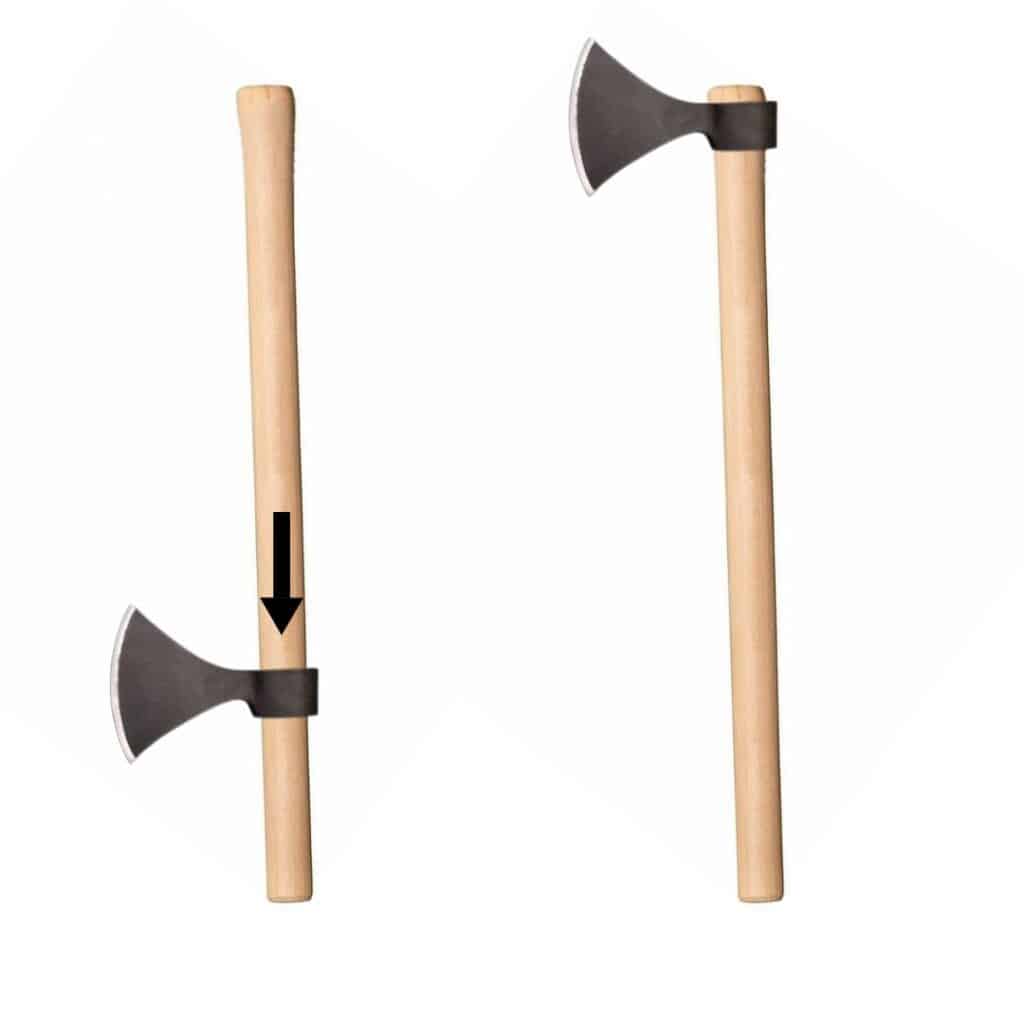
As mentioned previously, some tomahawks do have fixed heads, but conventionally they have a slip fit head. That is, the axe head is intended to be separate from, and slips onto, the handle, and is held on by friction alone (sometimes they are referred to as friction fit). It is a longstanding design, used for axes and other handled tools for thousands of years. It has worked well all that time too and offers some clear advantages for throwing – as well as a number of challenges.
Challenges of a Slip Fit Hawk
One perceived challenge with throwing a slip fit tomahawk is that a non-fixed head might slip off the handle while in use. Although this idea can be off-putting, in reality, there is little danger of the head becoming inadvertently detached from the handle. The head certainly will not fly off the top of the handle. A slip fit handle is tapered so that it is wider at the top. The eye of the axe head is also tapered, so that it is also slightly wider at the top, ie like a funnel. The handle is then inserted into the eye ‘funnel’ from the top and pulled tight, The bottom of the eye ‘funnel’ will always be smaller than the top of the axe handle, therefore the head will never fly off the top when used.
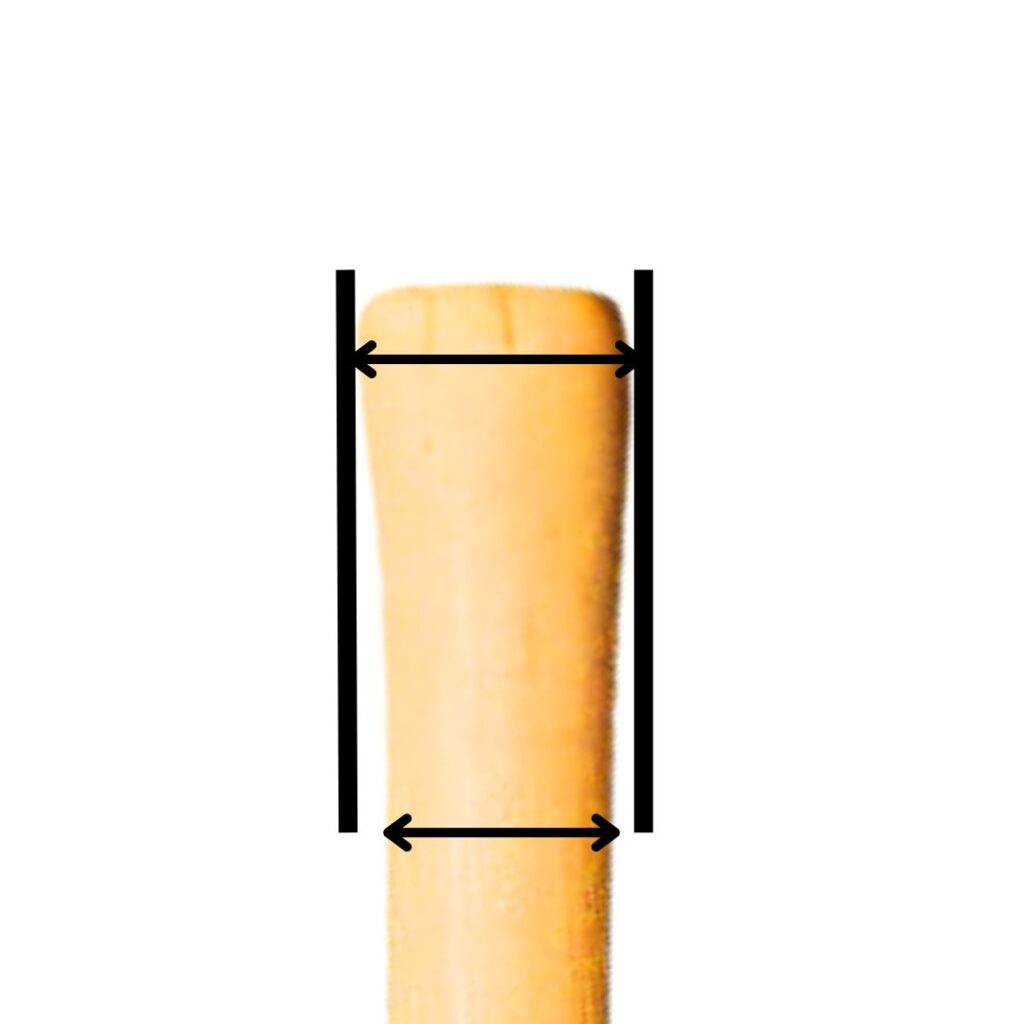
Of course, the detachable head can slip down the handle. When a hawk is thrown, the centrifugal force causes the head to push up into the top of the handle and solidifies the friction hold. It would therefore be unlikely for it to slip down while in use. There is a risk that the head could have become loose previously, and slip down the handle as you pick the hawk up to throw, so its always worth checking it before lifting it over your head obviously. As an extra precaution, some people will put tape around the handle just below the head, so that if it does become loose, it will not drop on their hand. Typically, athletics sports tape or hockey tape is used.
A common challenge when throwing slip fit hawks is that the impact of hitting the target will loosen the handle. The handle may be thrown all the way out on hit, or just loosened becoming a hazard, ie if someone picks it up later the head may drop down the handle. The answer to this is to simply ‘throw better’! If a hawk is always thrown well, then the head will tighten in flight and stay firm on impact. That is easier, said than done, of course. We can’t always throw perfectly, and a poor hit may result in the head falling down. This is more an inconvenience than a danger, so, as long as the handle is checked before your next throw, you could just accept it as part of the throwing process.
Alternatively, some people will fix a screw through the metal hawk head into the handle to secure it. Care needs to be taken that the screw is robust enough to stand the impact of the hit and won’t shear off, creating a greater hazard. Assuming it is, then this is a good way to prevent any movement no matter how bad the throw. This is more important for fibreglass slip fit handles where there is less friction.5 However, the normal capacity for the handle to come loose when the hawk hits badly does create a safety valve. The danger of fixing the head, is that the handle may then snap if it cannot slip down.
This all assumes that the handle has been fitted sufficiently to the hawk head in the first place. If the handle is loose in the eye then it will be more likely to fall down on impact. It is important that the handle is fitted snugly to the eye of the head. The inside edges of the eye should be filed with metal file to remove any anomalies. Then the procedure is to tap the top of the handle into the head, so that an indent can be seen where the head digs in the handle. Then removing the head, you file/sand the mark and the area above it. This is repeated until the head fits firmly again, with no give (the top of the head shouldn’t ever be above the top of the handle).
Throwing a hawk repeatedly causes a degree of stress on it, and if it is regularly knocked loose the handle will wear. In time you may get to a point, where it comes loose regularly, even with good throwing. It is often sensible to simply replace the handle at that point, but there are remedial options too. It is possible to provide some additional friction by thinly taping the top of the handle before pulling the eye over it. With repeated throwing use, the tape will wear and the head become loose again. If there is some additional length of handle above the top of the head, then it is a good option to file and sand the handle, so that the head fits further up the handle.
Advantages of a Slip Fit Hawk
The normal capacity for the handle to come loose on a slip fit hawk, means that it may avoid breaking as much as a fixed head axe. With a fixed head axe, if it hits at a bad angle or hits a knot or some such thing, then the sudden force on the head can transfer to the wood, causing it to break. The weight of the axe head simply snapping the handle, typically at the weakest point just under the axe head. With a hawk, often the handle will simple pop out, saving the handle.
Slip fit hawks still do break, unfortunately, but their primary benefit is that the handle can be replaced easily and quickly when they do. Throwing hawks/axes at targets is a good way to increase their chances of breaking, so it is great if you can simply grab a new handle and replace a broken one. Hanging a broken axe with a fixed head is a long and arduous task, that all but fairly competent woodworkers would attempt. It involves drilling out the broken piece from the eye, buying or creating a handle, cutting and shaping the handle for size, and fitting it firmly. In contrast, a broken slip fit handle is simply knocked out and a new one inserted. There may be some sanding/filing to fit the eye exactly, but nothing that the average hawk owner couldn’t do within a few minutes.
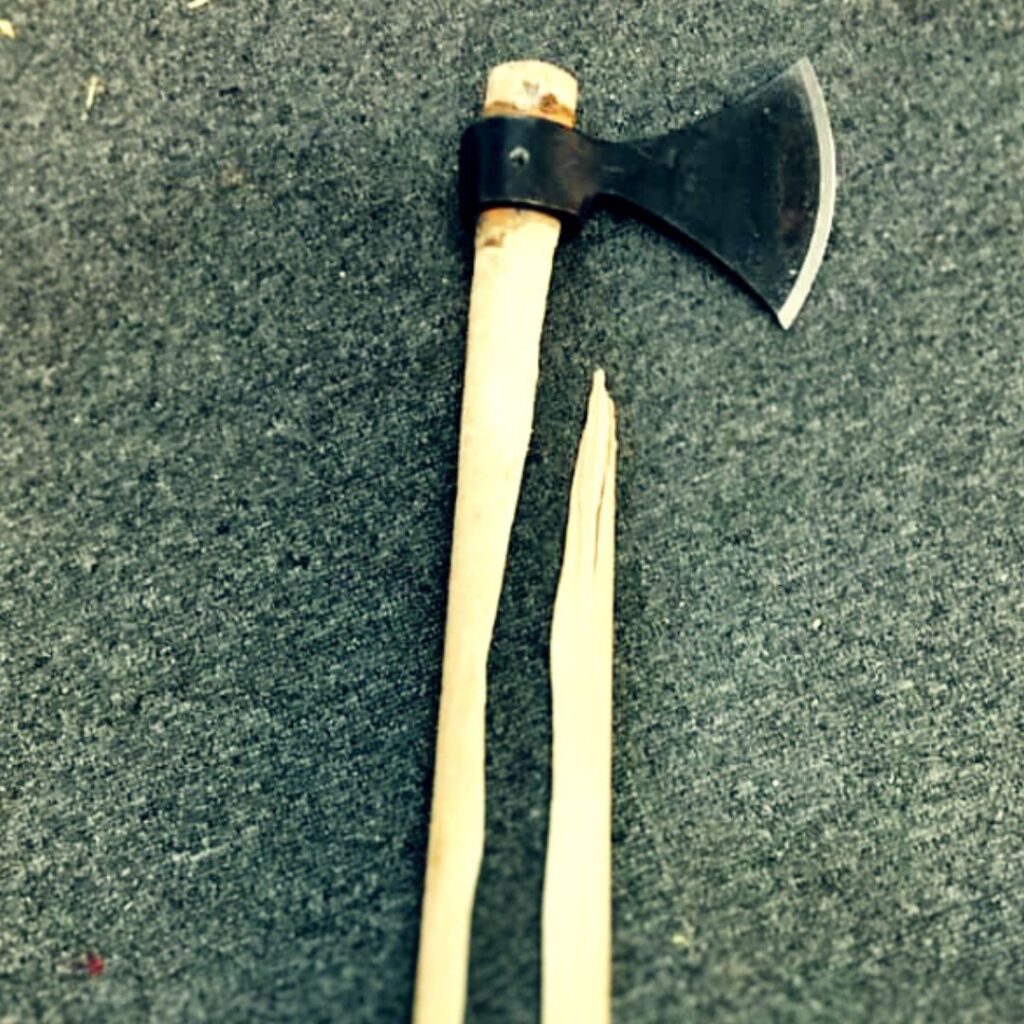
Slip fit handles tend to be cheaper than fixed head handles. If you can buy them off the shelf, fixed head replacement handles can cost £15+ per handle, and a lot more if you need to get them made for you. Simple slip fit handles can cost around the £5 mark (ie for wooden handles). Compared to the overall cost to fix, the slip fit hawk is even cheaper, as it is so easy to replace the handle. With the labour costs on top, a lot of the time the fixed head axe head is simply thrown out with the broken handle, as it is not economical to re-hang it.
Buying a Tomahawk
If you’re thinking of trying out throwing a tomahawk, there are plenty of knife and axe suppliers that sell them, off the shelf or even custom made. A quick web search will locate them, so there’s no advantage in providing a list of suppliers here, but there are a few points to consider before you part with your cash.
A good start would be to try a tomahawk out at a local range, or even an indoor venue. If you’ve never thrown one before, then that will help you to decide if they are for you. In addition to test throwing example hawks, you should also get plenty of advice from the coaches on how to throw and what to look out for.
If you do decide you want to throw your own hawks, then the next question is where to throw. Most club-based (usually outdoor) ranges allow you to throw your own equipment. In fact, they generally encourage it. Some urban, indoor venues allow you also, particularly those that are in to running leagues (that is just for social hawk throwing though. The two main indoor league organisers, WATL and IATF, do not allow tomahawks in their competitions currently).
The other option is to build your own boards to throw at. A simple target made of a few vertical planks is relatively easy to build at home, although the lighter hawks tend to be harder to stick in planks. More often, end-grain targets are are used for hawks. A tree round, ie slice of tree about 6inches thick is easy to hoist up on a wall or support, although they can be hard to find unless you know someone in the forestry industry. Creating an end-grain board, by cutting up squares of a soft wood, and assembling them in some sort of target frame, end-grain on, is a little more involved, but it is easy to buy the wood from any hardware store or sawmill.6
Once you’re ready to buy, it’s important to note that there are tomahawks on sale that are designed primarily to look good. For example, there are historic looking tomahawks, which cater for the reenactment folks and other enthusiasts. Some are intended to thrown, but you might not want to take the risk of breaking your prized peace pipe hawk. Unless you’re a confident hawk thrower and/or the aesthetic is more important, then a simple stick with a blade is more than sufficient to throw.
That said, you can buy more interesting hawk head designs that also throw well (and not waste your money on a pretty haft that doesn’t last). For example, I like the slip fit throwers produced by Raven Forge, a blacksmiths’ based in the UK. In particular, they’ve made a “Frank Thrower” with a blade in the style of the iconic Francisca axe. The long narrow cheek widening out to a 5inch bit looks very distinctive, and it throws and sticks well too!
One final note on buying a hawk. Although you should only need to splash out on the blade once, you will end up buying plenty of replacement handles for it over time. If you make your own then it’s obviously not an issue, but if you will be reliant on a supplier, then it is worth checking the price and availability in advance.
Enjoy Your Hawk Throwing
Hawk throwing is no more difficult to master than any axe, and often people prefer the feel of them. They are particularly good for children who need the lighter implement, but are a great challenge for adults too. There is a very satisfying feeling in hearing the distinctive swish of a hawk and seeing it firmly embed into the wooden target. Hopefully this feature has provided some practical advice and a little inspiration, to spur you on to start throwing hawks yourself.
- Dwight, T. (1752-1817). Travels in New-England and New-York. New-Haven: Timothy Dwight. Located at: https://www.christianebooks.com/pdf_files/timothydwighttravels1.pdf ↩︎
- See: https://www.knifethrowing.info/thrower-meetings.html for a (non-exhaustive) list of throwing competitions, both knife and axe/hawk throwing, in 2024 ↩︎
- For example, these indoor venues use hawks: Eat Sleep Axe, UK; Urban Safari, Spain; Lancer De Hache, France ↩︎
- For example, the WATL Butcher has an axe head that is about 77% of the overall weight ↩︎
- See the discussion on handle materials ↩︎
- See The Great Target Debate for more discussion on the merits of planks and end-grain ↩︎
